Table of Contents
Transaction
Transactions in Directo are usually generated automatically as a result of the confirmation of the original document. If necessary, transactions can be created manually.
The register of transactions is located at Finance → Transactions.
Directo allows to create both simple and compound sentences. One transaction can have 1 or many debit and credit sides. Transaction must be balanced (debit=credit), so that it can be saved.

1. Transaction buttons
1.1. Header buttons

- New - opens a new unfilled transaction.
- Save - saves transaction.
- Copy - makes a copy of the transaction. It means opens a new transaction with fields filled in the same way as the base transaction.
- Discard - the button is active when the entry is in draft status (an unsaved changes has been made to the transaction). After pressing the Discard button, the unsaved changes will be removed and the transaction will be in saved status.
- Delete - deletes the transaction. Asks in advance if you are sure you want to delete.
- Attachments - allows to attach files to the transaction.
- Mail - allows to send the transaction via email.
- Print - prints transaction.
- Open original - opens the original document. For example on transaction with type PUR, it opens purchase invoice.
- Periodize - periodizes the transaction.
- Create reverse transaction - creates new financial transaction based on the existing transaction, where debit and credit turnovers are switched. An “Reverse Transaction” with a reference to the original transaction is automatically placed to the description of the new financial transaction.
- Create minus transaction - creates new financial transaction based on the existing transaction, where the signs for the accounts turnovers are reversed. An “Minus Transaction” with a reference to the original transaction is automatically placed to the description of the new financial transaction.
1.2. Row buttons

- Copy selection - copies the selected rows to the copy buffer. To select rows, press on the row number. The button is not active if no rows are selected. Copied rows can be pasted from the row context menu (opens when you right-click on the line number) with “paste rows”.
- Delete selection - deletes the selected rows. To select rows, press on the row number. The button is not active if no rows are selected.
- Bulk insert - allows to fill/place rows based on a spreadsheet (mostly excel). The order in which the columns should be is listed in the HELP under the Bulk insert button.
- Paste recipe - to place a recipe.
- Split from Resource - divides the rows marked with the resource number (the resource must be verified) by the rows of the corresponding resource. The amount is divided by the quantities of resource rows. Object, project, customer, and supplier from the resource rows are placed on the transactions rows.
 - these buttons affect the height of the rows.
 - for exporting table or selected rows to Excel.
 - from this button transaction row fields can be selected and unselected. Only selected fields are displayed on transaction.


2. Transaction fields
2.1. Header fields
The fields on transactions header are selectable and the locations can be changed from  button .
- Type - indicates the type of transaction. Only FIN type of transactions can be created with the Add new button. In other cases, these are transactions from the subsystem, for example the type of entry that occurs when an invoice is confirmed is an INVOICE.
- Number - transactions number.
- Date - transactions date. Can be entered using the calendar by clicking on the calendar icon.
- Reference - location reference. For example, a sales invoice is created from location: Tartu, then a reference to Tartu appears in the invoice transaction.
- Description - explanation of the transaction.
- Debit - computational field. Total debit turnover for transaction rows.
- Credit - computational field. Total credit turnover for transaction rows.
- Difference - computational field. The difference between debit and credit. Transaction can be saved only if it is balanced and the difference is 0.
- Company - used in group consolidation bases.
2.2. Row fields
The columns of the table of financial transaction rows are selectable and the locations can be changed, you can read more about it from here.
- Account - financial account.
- Object - related object(s) in other words financial dimension(s).
- Project - project code. Used for linking to a specific project.
- Description - explanation of the row. Name of the account is entered here automatically when account is placed. If an account is entered later or needs to be changed, but description shouldn´t be overwritten with the account name, then
System settings> Purchase invoice and expense document account placing takes description always from accountshould be set to no. - Debit - debet row amont. Double-clicking on the debit field will place the balance of the account on the row (with the time of the transaction).
- Credit - credit row amount. Double-clicking on the credit field balances the entry.
- VAT code - VAT code.
- Date - row date. If empty, the date of the header applies to the row.
- Customer - customer code.
- Supplier - supplier code.
- Resource - resource number. Must be filled to divide row with “Split from Resources” button.
- Cur. Debit - debit * rate.
- Cur. Credit - credit * rate.
- Currency - row currency.
- Rate - row currency rate. Placed automatically when placing the currency (if the currency and currency rate are in the base).
- Qty - row quantity.
- PID - purchase ID field, appears if the system setting 'Fiscal Transactions have PID', is YES.
3. Periodization of the transaction (NEW DESIGN)
The periodization functionality of the transaction allows to periodize the financial transaction, i.e. distribute the amount over a longer period.
 Only works on the new design transaction.
3.1. Periodization methodology
Periodization is based on two rules: monthly periodization and daily periodization.
Monthly periodization - period is divided into months and all the periodized parts are equal. Monthly periodization applies if applies the formula: periodization end date + 1 = periodization start date. Periodization period can be divided into full months.
These periods are for example:
Example A: 01.02.2019-31.01.2020 (31. + 1 = 1. day) and the period is divided exactly into 12 months;
Example B: 20.02.2019-19.12.2019 (19. + 1 = 20th day) and the period is divided exactly into 10 months.
⇒ (01.03. until 30.11 = 9 months) + (20.02 until 28.02.2019 = 1/3 months) + (01.12 until 19.12.2019 = 2/3 months) = 10 months.
If the periodized sum is 300 EUR, then in example A the period sum is: 300 EUR / 12 months = 25 EUR and the same sum applies to all periods.
In example B the period sum is: 300 EUR / 10 months = 30 EUR.
- 30 EUR applies to every month in period 01.03.-30.11.2019 (9×30 EUR).
- Between the periods 20.02 -28.02.2019 and 01.12-19.12.2019, which form an additional month, 30 EUR is divided so that the first period receives its share in proportion to the days remaining in that month and is based on a 30-day month ⇒ 30/30 * 20 days = 20 EUR. The periodization balance goes to last partial month 300 - 270 - 20 = 10 EUR.
Daily periodization applies if the period is not divided into full months or the rule periodization end date + 1 = periodization start date does not apply, and as a result, all periodized parts have a different amount according to the number of calendar days in the month.
3.2. Periodization of the transaction
Periodization of a transaction can be started from a saved transaction by pressing the “Periodize” button in the header.

In the new design, pressing the “Periodize” button opens the first pop-up window where you can set the parameters of periodization. 
- Description – description of the periodized transaction, with an automatically added identifier for periodization.
- Side – selectable from a dropdown menu, allowing you to choose, whether you want to periodize the debit or credit side.
- Frequency of transactions (months) – selectable from the drop-down menu between 1-12. The explanation can be seen by going to the cell with the cursor.
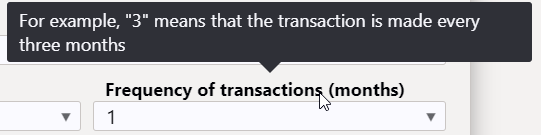
- Start of period – the start date of the periodization.
- Number of transactions – allows you to enter the number of times the transaction is made. The explanation can be seen by going to the cell with the cursor.
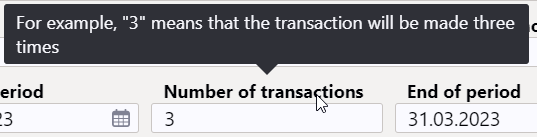
- End of period – the periodization end date, which comes automatically according to the number of times entered, but can also be written manually.


After filling in the parameters, press the “Forward” button below, which opens the second pop-up window:

- Account – shows the account to be periodized (selected in the first pop-up window, whether debit or credit side is periodized).
- Account VAT – allows setting the VAT code for the account
- Account objects – allows setting objects for the account, separated by commas, which will also appear on the periodized transaction.
- *Corr. account – corresponding account, mandatory field. When you go to the field with the mouse, you will see the name of the account in the tooltip.


- Corr. account VAT – allows setting the VAT code for the corresponding account.
- Corr. account objects – allows setting objects for the corresponding account, separated by commas.
- Sum in base currency – shows the amount to be periodized.
- e.g 01.01.2023 – shows the amount to be periodized on that date; this can be manually overwritten.
Pressing the  button will create the periodized transaction, which will be in draft form in the new design. If, upon review, the result is not as desired, pressing the
  button in the header will remove the periodized transaction lines, allowing you to start periodization again.

With the parameters given above, a periodized transaction is created by pressing the “Save” button in the draft form:

The periodized transaction will have different periods separated by dividing lines. The first section shows the original transaction lines with postings to the corresponding account and the subtraction of the periodized line to avoid double expenses/income.
- Line 1 and 2 – original transaction
- Line 3 – posting to the corresponding account to the extent of the balance of the amount to be periodized
- Line 4 – crediting of the expense account to be periodized, i.e. subtraction to the extent of the balance of the amount to be periodized
If you have already saved the transaction in draft form, it is possible to delete the lines either one by one or all at once, as a result of which the “Periodize” button in the header becomes active again and it is possible to start periodization again.

3.3 Examples:
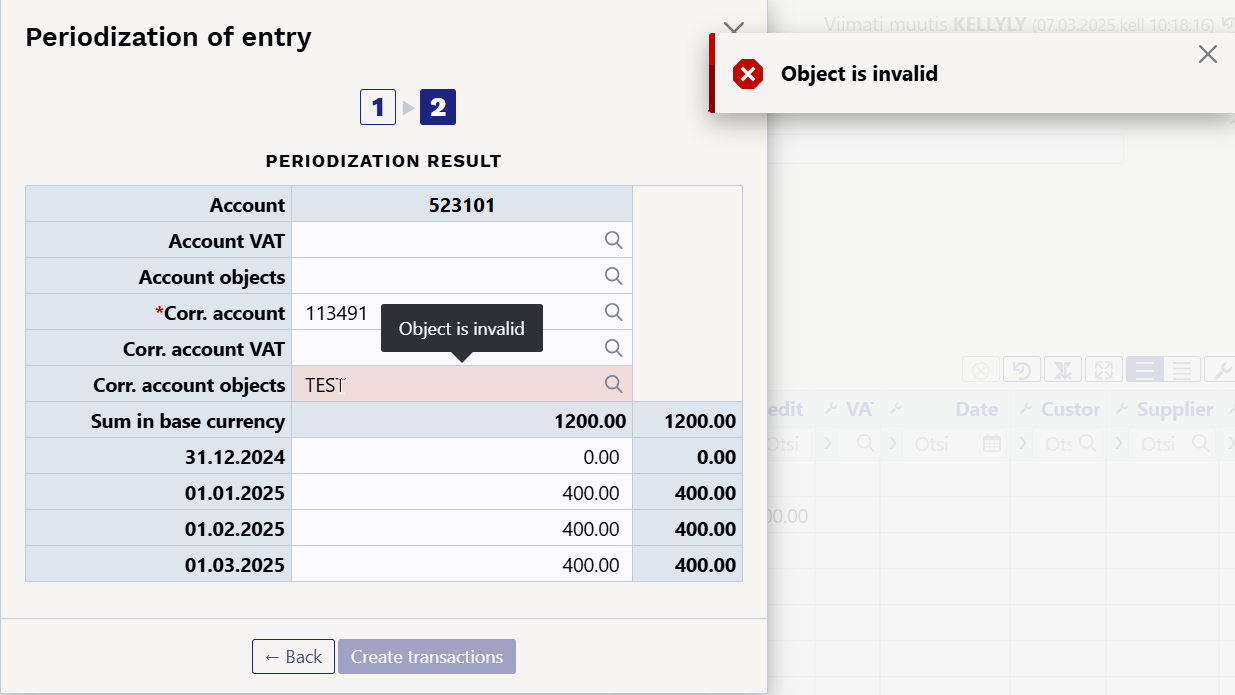
3.3.1 Entering an incorrect parameter
If the entered object does not exist, the box will turn red upon leaving the field, and a corresponding error message will be displayed, similar to other fields.

3.3.2 Periodizing a transaction once per quarter over a year
- Frequency of transactions (months) – the transaction is made every 3 months
- Number of transactions – the transaction is made 4 times


Result:

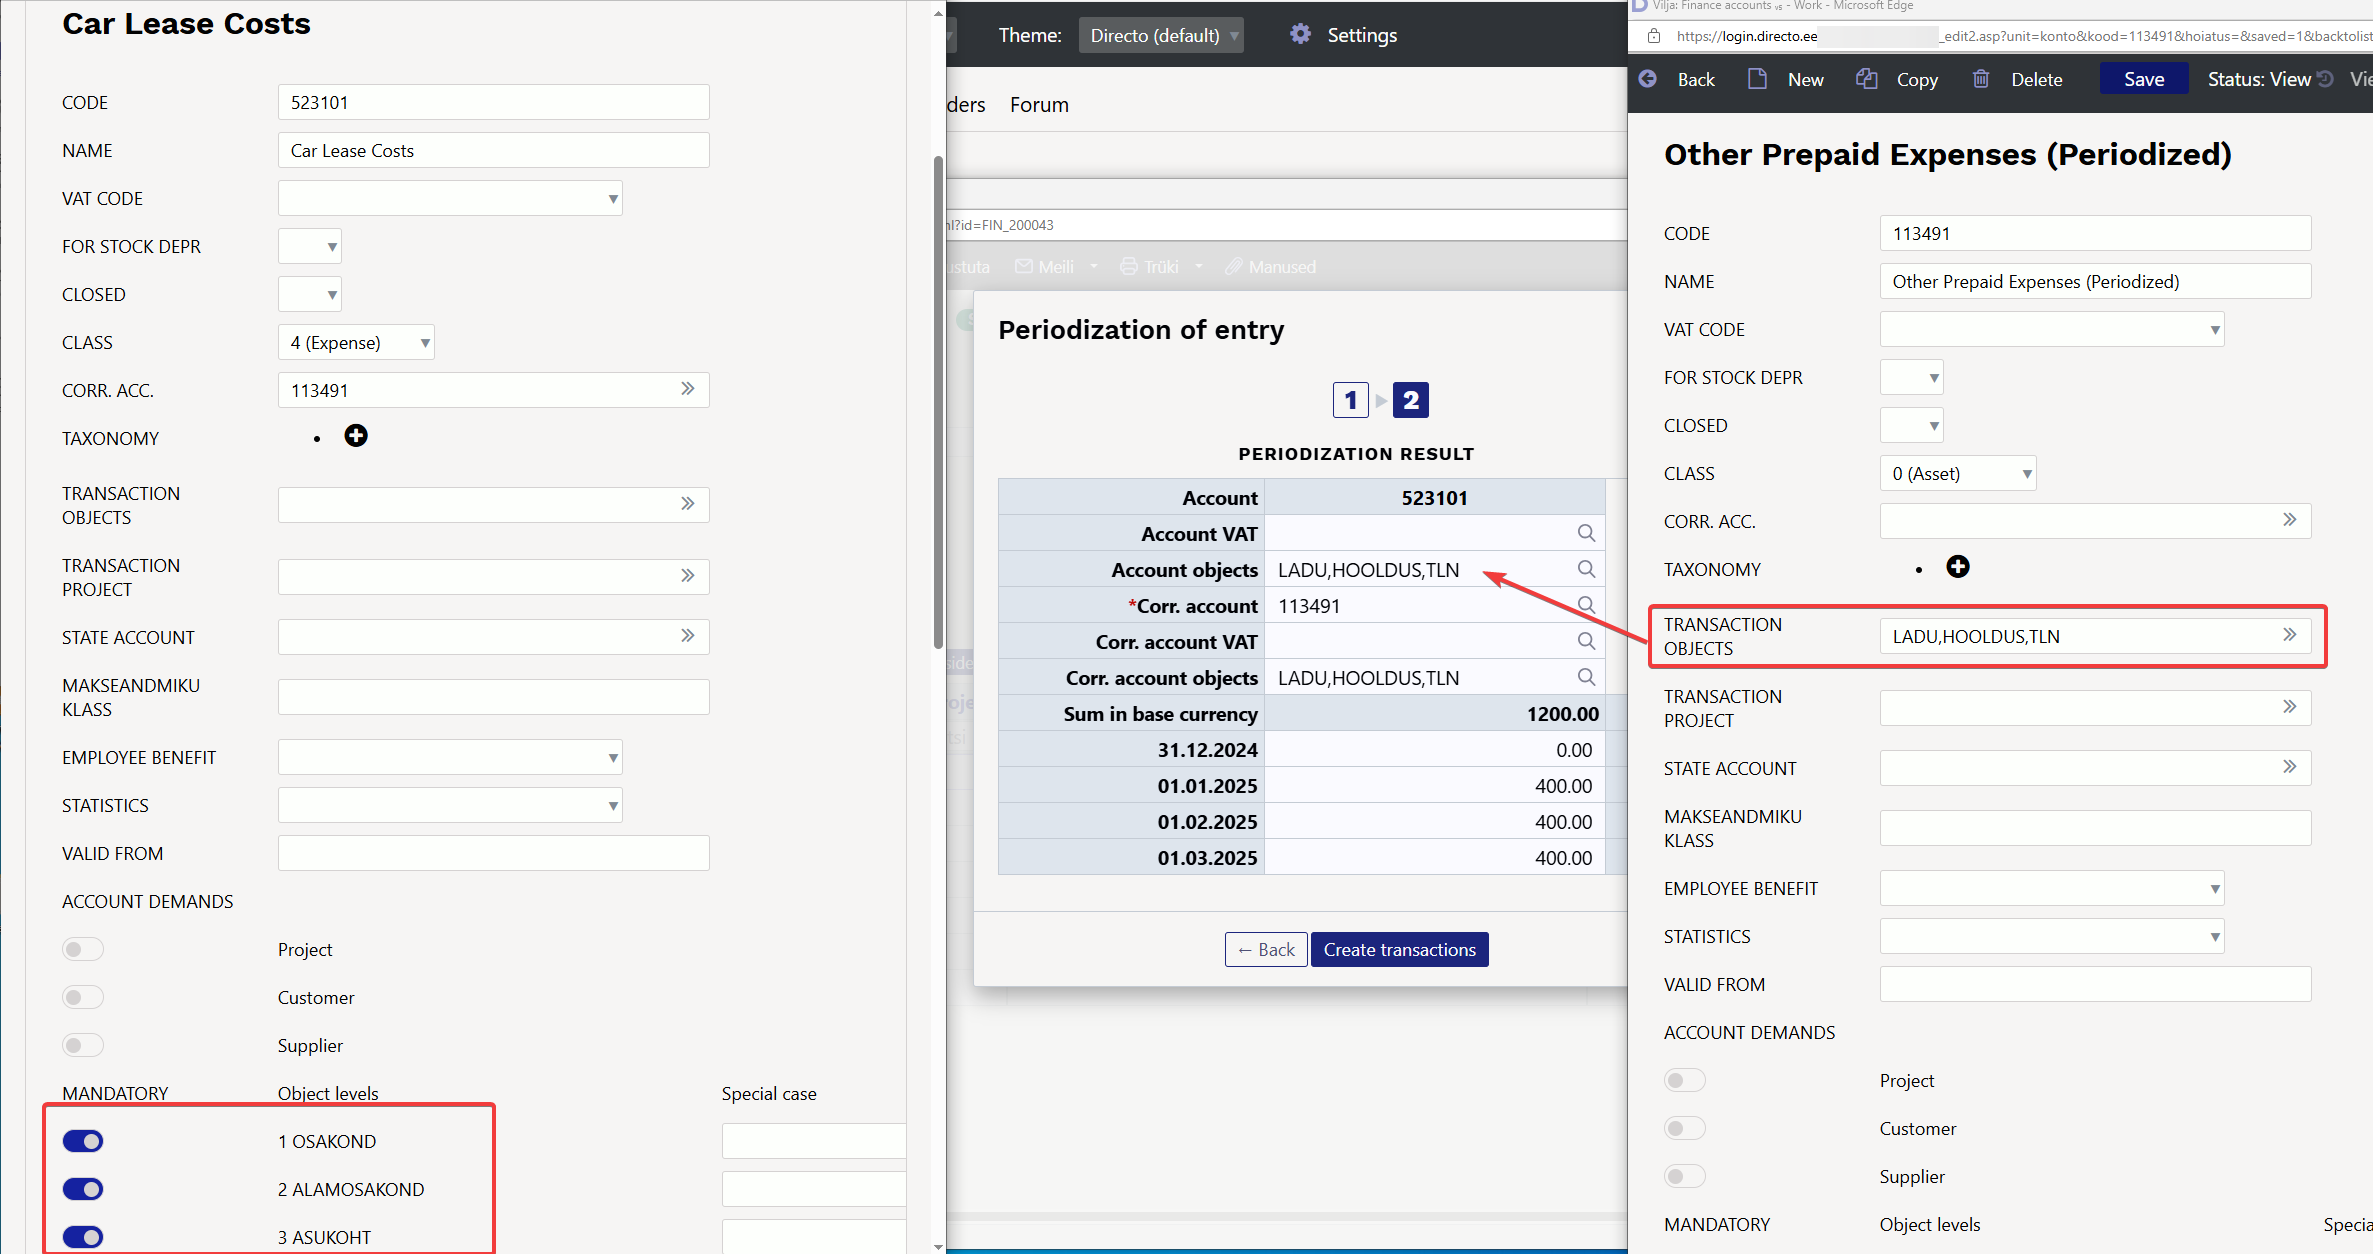
3.3.3 Periodization of multiple transaction lines

If there are more lines to be periodized, the second pop-up window shows both accounts that are periodized. If desired, different data can be assigned to them, in this example, different account objects.


Pressing “Create transactions” and “Save” generates a periodized transactions, showing that each account has its object:

3.3.4 Daily periodization, i.e. the period amounts are not equal
In this example, the periodization range cannot be divided into whole months, and periodization takes place with daily precision. The second pop-up window shows how the amounts are calculated according to the number of days.


Pressing “Create transactions” and “Save” generates a periodized transaction:

In the second pop-up window, you can manually overwrite the amounts yourself. If, for example, you manually enter 1000 in the cell for the amount of 19.01.2023, the last cell will contain the amount with a minus and the warning message “Check sums” will appear in the top right.

3.3.5 If there is also VAT on the transaction, but you do not want it to be periodized
If the transaction includes VAT and you are periodizing the debit side, and you do not want the VAT to be periodized, enter the same account used for input VAT as the corresponding account.


As a result, the transaction will be rotated on the same account:

3.3.6 Object level requirement
Corr. account objects
- If the corr. account has object, the corr. account object is also in the periodization window.
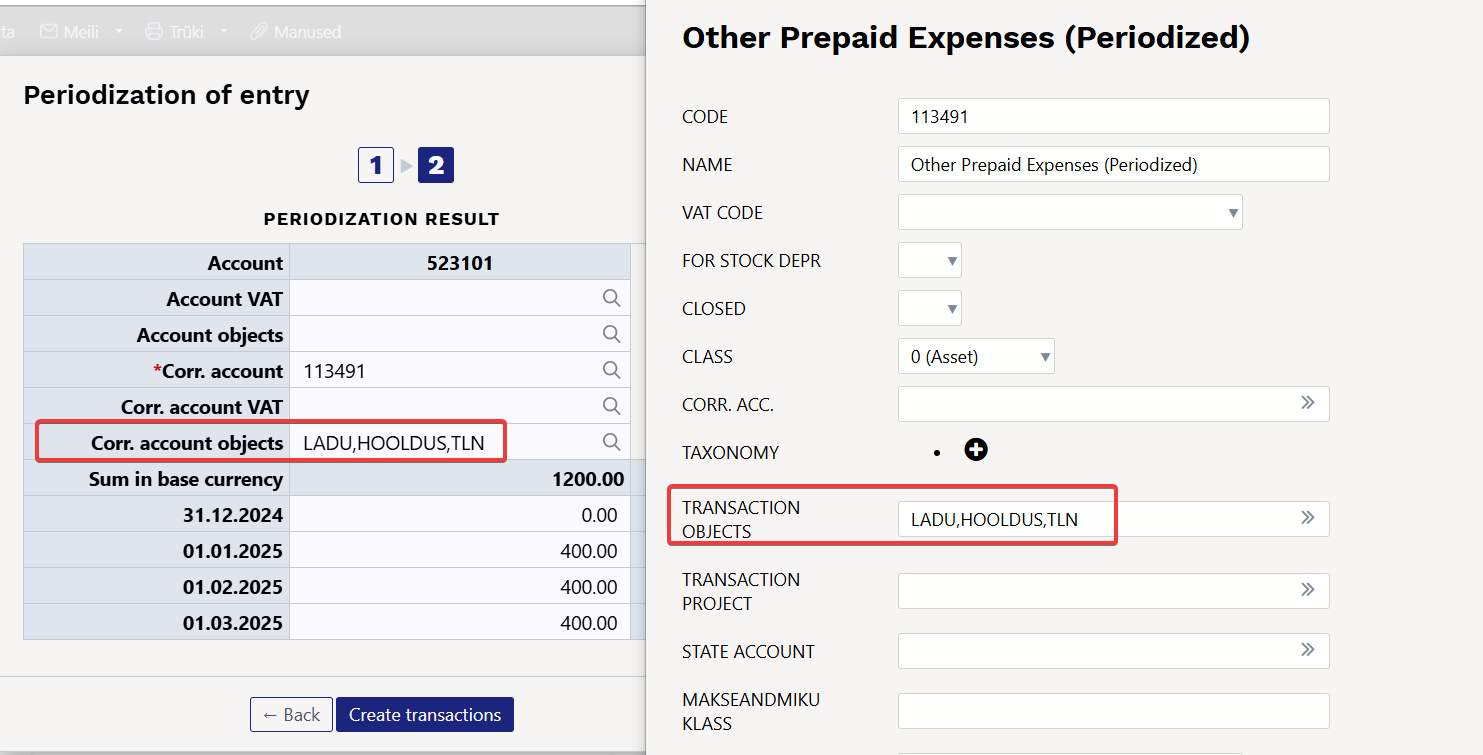
- If there is no object in the corr. account, but object levels have been set, the account object will appear in the field.
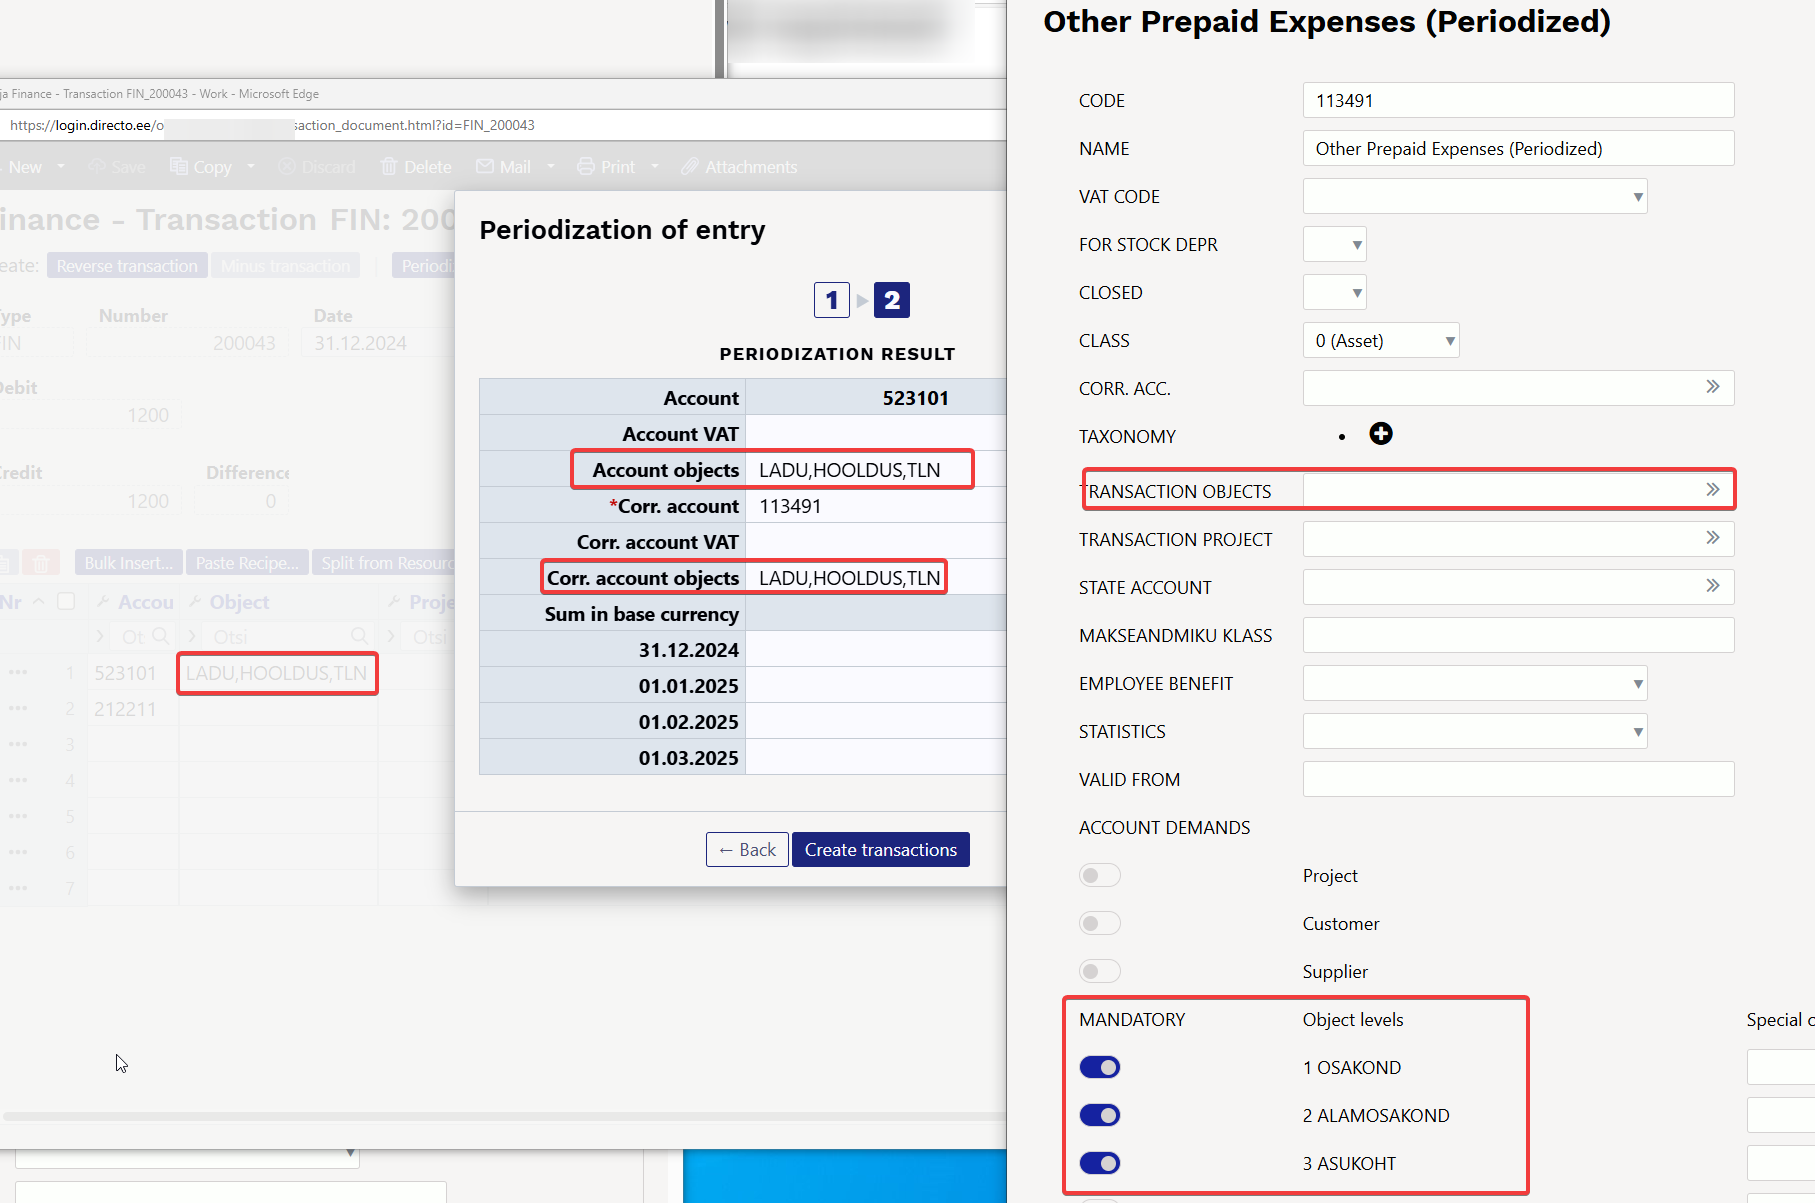


Object of account subject to periodization
- If the account is missing an object but it has object levels, the corr. account object will be placed there.

Error messages
- If the level of the object in the field does not match, the field will be red and transactions cannot be created. This also means that objects with a different level cannot be placed.
- The error field has the following explanatory tooltips:
- 'object is invalid' ⇒ such an object does not exist at alL
- 'object with required level is missing' ⇒ the account has a specified level, but an object with that level has not been added
- 'invalid object level' ⇒ the entered object level is not allowed in the account

4. Periodization of the transaction (OLD DESIGN)
Periodization of a transaction can be started from a saved transaction by pressing the „Periodize“ button in the header.

In the old design, pressing the „Periodize“ button opens the first pop-up window where you can set the parameters of periodization.

- Description – description of the periodized transaction, with an automatically added identifier for periodization.
- Side – selectable from a dropdown menu, allowing you to choose, whether you want to periodize the debit or credit side.
- Period – selectable from the drop-down menu between 1-12. Sets the period after which the transaction is made. For example, number 1 states that a transaction is made every month, while 12 states that a transaction is made every 12 months, i.e. once a year.
- Start date – the start date of the periodization.
- Times – allows you to enter the number of times the transaction is made.
- End date – the periodization end date, which comes automatically according to the number of times entered, but can also be written manually.
- Reset accounts – this should be ticked when expense and income accounts are periodized, so that double costs/incomes do not arise as a result of the periodized transaction.
After filling in the parameters, press the „Forward“ button below, which opens the second pop-up window:

- Account – shows the account to be periodized (selected in the first pop-up window, whether debit or credit side is periodized).
- VAT – allows setting the VAT code for the account.
- Corr. account – corresponding account, mandatory field. When you go to the field with the mouse, you will see the name of the account in the tooltip.

- VAT – allows setting the VAT code for the corresponding account.
- Object – account objects, must be entered directly into the transaction. In the new design, you can also add on a pop-up window.
- e.g 01.01.2023 – shows the amount to be periodized on that date; this can be manually overwritten.
if “Reset accounts” is ticked, then pressing the “Create transactions” button, button will create the periodized transaction:

The periodized transaction will have different periods separated by dividing lines. The first section shows the original transaction lines with postings to the corresponding account and the subtraction of the periodized line to avoid double expenses/income.
- Line 1 and 2 – original transaction
- Line 3 – posting to the corresponding account to the extent of the balance of the amount to be periodized
- Line 4 – crediting of the expense account to be periodized, i.e. subtraction to the extent of the balance of the amount to be periodized
If “Reset accounts” is not ticked, the transaction is like that:

5. Examples (OLD DESIGN)
5.1 Periodizing a transaction once per quarter over a year
- Period – the transaction is made every 3 months
- Times – the transaction is made 4 times


Result:

5.2 Periodization of multiple transaction lines

If there are more lines to be periodized, the second pop-up window shows both accounts that are periodized. If desired, different data can be assigned to them, in this example, different VAT codes.


Pressing “Create transactions” and “Save” generates a periodized transactions, showing that each account has its VAT codes:

5.3 Daily periodization, i.e. the period amounts are not equal
In this example, the periodization range cannot be divided into whole months, and periodization takes place with daily precision. The second pop-up window shows how the amounts are calculated according to the number of days.


Pressing “Create transactions” and “Save” generates a periodized transaction:

In the second pop-up window, you can manually overwrite the amounts yourself. If, for example, you manually enter 1000 in the cell for the amount of 19.01.2023, the last cell will contain the amount with a minus.

5.4 If there is also VAT on the transaction, but you do not want it to be periodized
If the transaction includes VAT and you are periodizing the debit side, and you do not want the VAT to be periodized, enter the same account used for input VAT as the corresponding account.


As a result, the transaction will be rotated on the same account:

6. Fine-tuning
Button  on the right side of the header opens the fine-tuning settings.

- Currency rate by row date - if this setting is activated, the exchange rate is set according to the row date. If this setting is not activated, the rate is set according to the date in the header.
- Attachment preview - whether and where a preview of the attachment attached is displayed. Options are missing, right and bottom.
6. Bulk insert
You can create transaction rows in Excel and bulk insert them directly to the transaction.
- If the account number is specified and the description box is empty, the account name is placed in the Description box
- Amounts are placed on the transaction with both a plus and a minus sign
- Only one amount can be bulk inserted, either in the debit or credit column
- Zero is not a number, i.e. it is possible to insert amounts from an Excel table with Debit 0.00 and Credit 40.00. After importing, only Debit (empty) and Credit 40.00 remain.