en:fin_valjamaks
Table of Contents
Expense due
The Expense due document is created to compensate the expenses made by the employees.
Expense due can be initiated
1) Directly from the expense document by pressing on Expense due - when creating a payment from the expense document the pre-filled expense due card will open.
2) From registry Finance - Documents - Expense due, by pressing Add new.
3) If there are a lot of expenses, the expense due can be created in Finance - Reports - Expender Report.
Enter the right period, select confirmed from the Confirm cell and empty from the Status cell. By pressing the Create expense due button, a pre-filled expense due document opens.
1. Expense due buttons
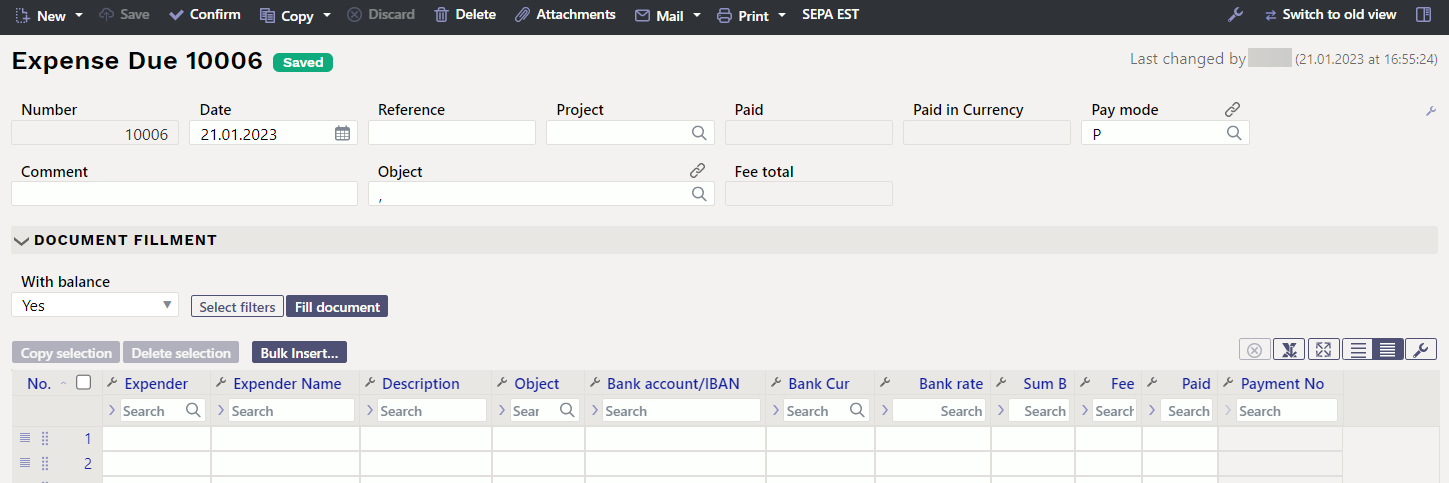
1.1. Unconfirmed expense due header buttons
Old view
New design
- New - opens new blank document. Checks in advance if the previous document contains unsaved changes.
- Save - saves the document
- Confirm - confirms document if save button is pressed after confirm button. As a result, a transaction related to the netting in is automatically created.
- Copy - makes a copy of the document. It means new document is created, where most fields are filled in as in the source document (range of copying depends on the
System setting - Document copy selection). - Delete - deletes the document
- Attachments - possibility to add attachments
- Mail - sends printout with e-mail. In case there is more than one printout designed pressing “Mail” with right mouse button will open the selection.
- Print- creates printout. After pressing “Print” printout preview will be shown for a moment and after that print dialog will be opened. For separate printout preview hold “Shift” button on keyboard and press “Print” on the document. In this case print dialog will not be shown automatically. After pressing “Ctrl” + “P” on keyboard print dialog will be opened. If there is more than one printout designed pressing “Print” with right mouse button will open the selection.
- Close - closes the document, after checking if the document has unsaved changes
- Refresh - cancels the document creation, all changes will be lost. Pressing F5 on keyboard will give the same result.
- L_EXPORT - imports the expense due file into the Internet bank (old view)
- SEPA EST - imports the expense due file into the Internet bank (new design)
- Forum - you can read and write about Directo, also can start own forums within company.
- Bulk insert - allows you to fill/place rows based on a table (mostly excel). In the bulk insert window there is a description of the columns order in Help section.
- Add expenders with balance - all confirmed but unpaid expenses can be added to the rows
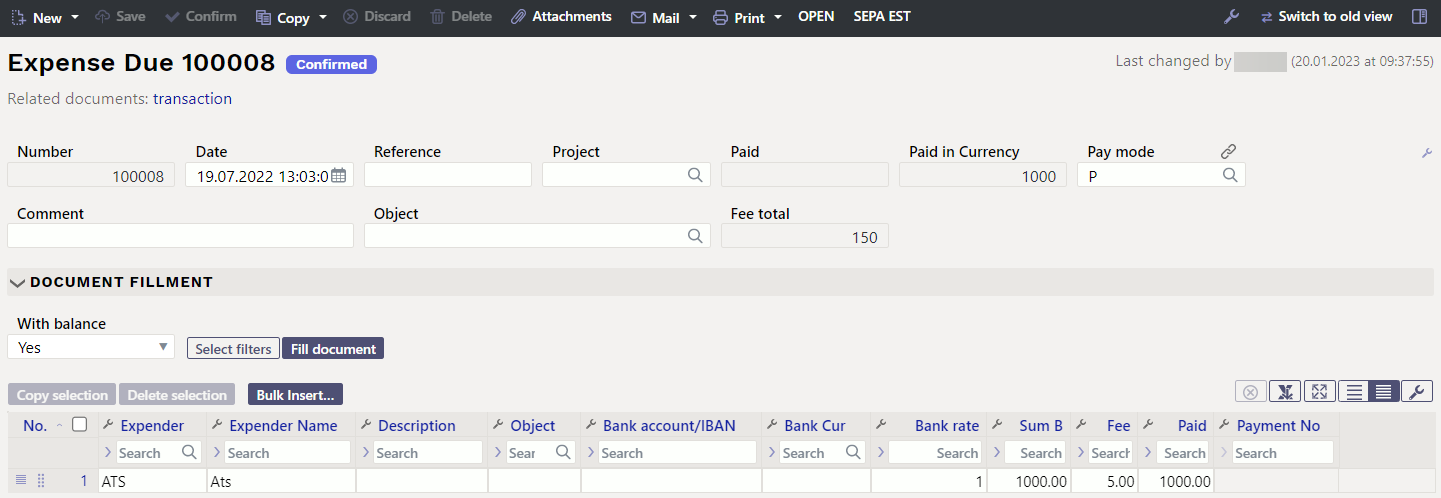
1.2. Confirmed expense due header buttons
- OPEN - allows to open the document (if the user has rights)
- Transaction - opens a transaction related to the expense due
2. Expense due fields
2.1. Header fields
- Number - document number. When making new document range code is shown there. The right range can be selected By double-clicking or with Ctrl+Enter.
- Date - document date
- Reference - reference to expense
- Project - if the expense is related to a specific project, the project code can be entered here.
- Paid - the total sum to be paid out
- Paid in currency - shows the sum paid in foreign currency
- Pay mode - payment mode. With double-click or “Ctrl” + “Enter” it's possible to select, change or add new payment mode. Payment mode settings can be found
Settings > Finance settings > Payment mode. - Comment - can add a comment related to a payment or expense. When making a payment from an expense, the related expense information is automatically placed. When importing the expense due to the bank, the comment field is displayed on the payment details.
- Object - if the expense is related to a specific object, the object code can be entered here.
- T-tasu kokku - field for bank fees i.e. shows how much the service fee was calculated in the bank.
2.2. Row fields
- Number - number of the row
- Expender - expender code. Expender can be selected with double click or “Ctrl” + “Enter” combination. If the expense due is made to several persons, a separate row must be added for each expender.
- Name - expender's name is filled automatically, when placing the customer on the document.
- Description - text field, optional
- Object - reas olev objekt tuleb täpsustada, kui konkreetsele reale kehtib konkreetne objekt või objektid erinevatelt tasemetelt. Kui kõikidel ridadel on sama objekt või erineva tasemega objektid, tuleb need määrata päise väljale Objekt.
- Bank account/IBAN - bank account number of the expender, to which the payment will be made. The bank account number is automatically entered on the document, if the employee's bank account number is marked in the Salary module section of the employee's card.
- Bank cur - currency of payment
- Bank rate - exchange rate (against Euro). If the payment currency is not Euro, then in the Rate field is displayed the exchange rate of the automatically set currency (against Euro). If necessary, the automatically set exchange rate can be changed.
- Sum B - shows the sum to be paid
- Fee - field for bank fees
- Paid - shows paid sum
- Payment no - payment number
en/fin_valjamaks.txt · Last modified: 2023/01/24 14:02 by triinp


